


How to perform OS Installation
With the help of this automation system, you would be able to perform operating system installation (Windows* /Linux) on your server at your ease. This feature is only available to clients who have taken dedicated servers service from Psychz Networks.
*Windows installation feature is only available if you have opted for a Windows Operating System by paying the license fee.
- Step 1: Access your device page
- Step 2: OS installation option
- Step 3: Selecting OS category
- Step 4: Choosing OS flavor
- Step 5: Disk Partition
- Step 6: Defining Hostname and other details
- Step 7: Accepting Terms of Installation
The following article will guide you how to perform an OS installation on your server.
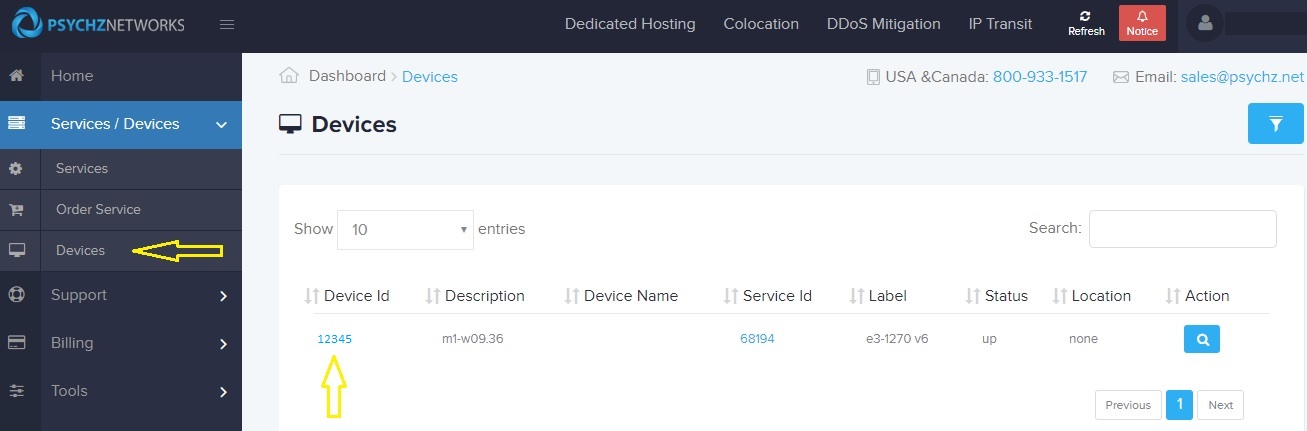
Step 1
Login to your dashboard and click on Devices page under 'Services / Devices' as indicated by an arrow in the screenshot below.
Once you click on Devices you will see list of devices you own on the right hand side. In case you have only one device (dedicated server) you will see something similar to as shown in the screenshot below. Click on the Device ID as indicated by a yellow arrow.
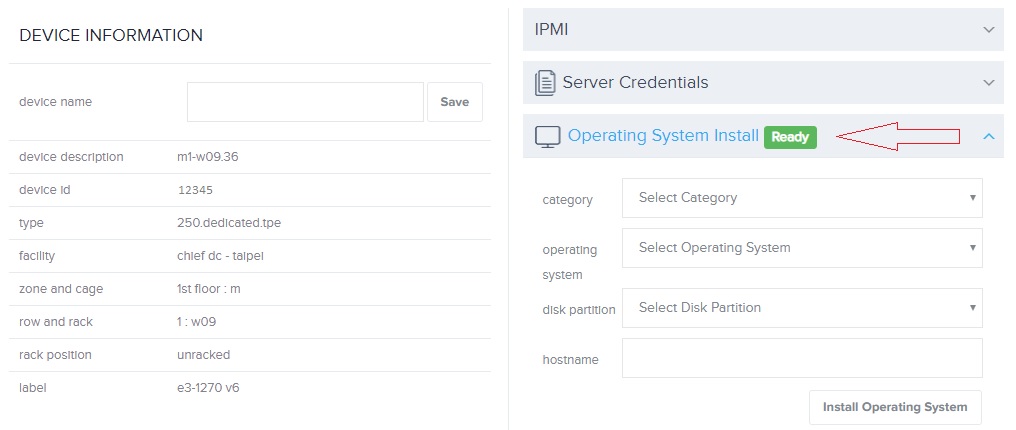
Step 2
Once you click on the device ID, it will lead you to DEVICE INFORMATION page where you can find various information about your device like the location of the device, position, cage type, processor type, etc.
On the right hand side you will observer Operating System Install menu option among the other as pointed in the screenshot below.
Once you click on this menu, you will many other options opening up. Let us discuss each one of them in detail while we perform the demo installation.
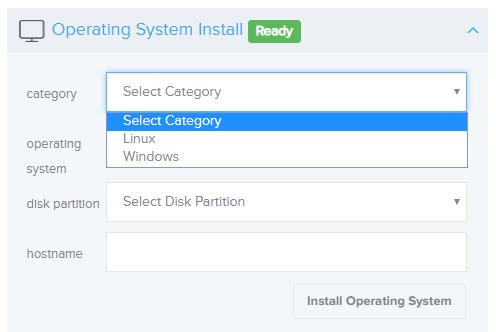
Step 3
The first option that you notice under Operating System Install menu is 'Category'
This lets you choose what type of operating system you would like to install on your server. We offer various OS flavors under Windows* and Linux category as shown in the screenshot below.
*Windows installation feature is only available if you have opted for a Windows Operating System by paying the license fee.
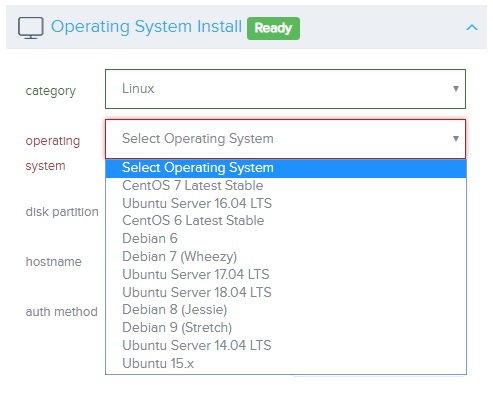
Step 4
Once you select the 'Category' from Windows or Linux, it will populate the next option which is 'Operating System'. This is nothing but the flavor and version of the Operating System. In the following screenshot we have shown flavors of Linux Operating system.
Each of the flavors has their features different from each other. You need to carefully read online documentation to understand which one may suit you and your requirement better.
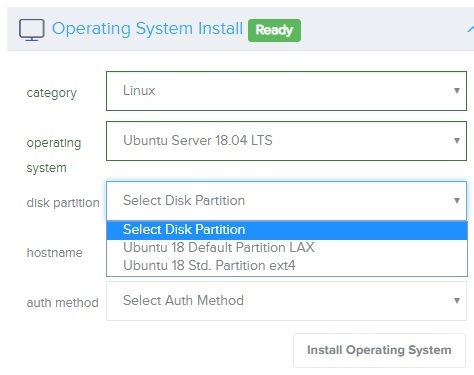
Step 5
Disk Partition: You can choose one of the partition type that meets your requirement.
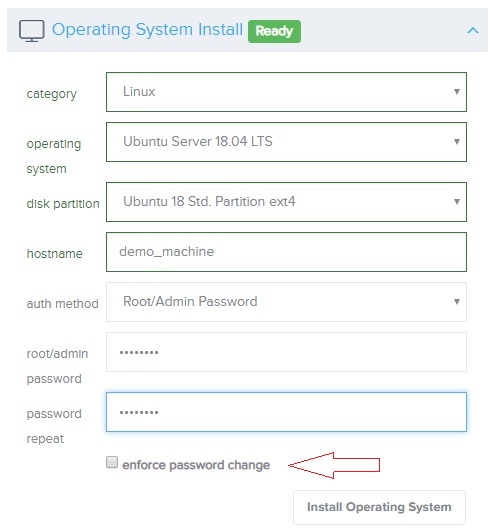
Step 6
Under 'Hostname' you can choose the hostname for your device. A hostname is the label (the name) assigned to a device (a host) on a network and is used to distinguish one device from another on a specific network.
Under 'Authentication Method' you need to choose Root/ Admin Password. This will open up two more fields 'Password' and 'Password Repeat'. You need to mention the root password that you wish to save to login to your machine once the installation is completed.
You can enable 'Enforce password Change' by ticking the check box next to it as pointed by the arrow in the below screenshot. This will enable user to change the password immediately after logging into the machine.
Step 7
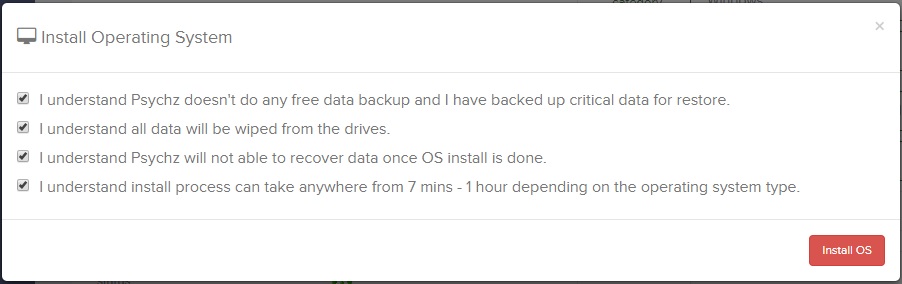
Click on the 'Install Operating System' button once you have entered all the details. This will open a popup notification as shown in the screenshot below. You need to carefully read each of the clauses and tick on each of the clause. Only once you accept all the terms, the Install OS will activate and let you proceed with the installation.
Step 8
Once you check all the clauses and click on the Install OS the system will initiate the installation. You should get following popup message once the installation is initiated.

Please note that the installation will take 15 to 90 mins depending on type of Operating system and flavor or version of the same. The average install time for Linux can vary from 15 mins - 60 mins and for windows it can vary from 60 - 90 mins.
Once the installation is completed, you will get a notification on your email. You can also check the status of your device on your device page. 'Ready' indicated that your installation process is complete and your device can be accessed now.